The chronicles of adding raw food to my diet

On this blog, I'll post about the transition to a more raw food based diet. Check back often for posts on raw foods that I'm eating!

Sunday, January 16, 2011

gRAWnola!

My friend and colleague Rob Costello posted this recipe on his youtube channel, so I decided to try it out. It's a gluten free, sugar free and delicious gRAWnola made from nuts, berries (goji, mulberries and golden berries), spices and buckwheat groats.
Buckwheat is a nutritional powerhouse, packed with all of the essential amino acids, rich in iron, zinc and selenium, and high in antioxidants. The berries in the gRAWnola are packed with antioxidants and vitamins. The nuts are packed with protein and healthy fats. The mix is called gRAWnola because it is dehydrated at 105 degrees in order to preserve the digestive enzymes and to keep the components raw.

The first step to making gRAWnola is the soak step, an overnight soak in water in order to remove the enzyme inhibitors found in nuts, seeds and grains; the berries are soaked as well to rehydrate them.
Soaking the buckwheat:
Soaking the nuts (hazelnuts, almonds and cashews):
Soaking the berries (goji berries, mulberries and golden berries):
After an overnight soak, all of the components are drained and rinsed well. The buckwheat gets very gooey and needs to be rinsed a number of times. Here are the berries and the buckwheat after the soak and the rinse:
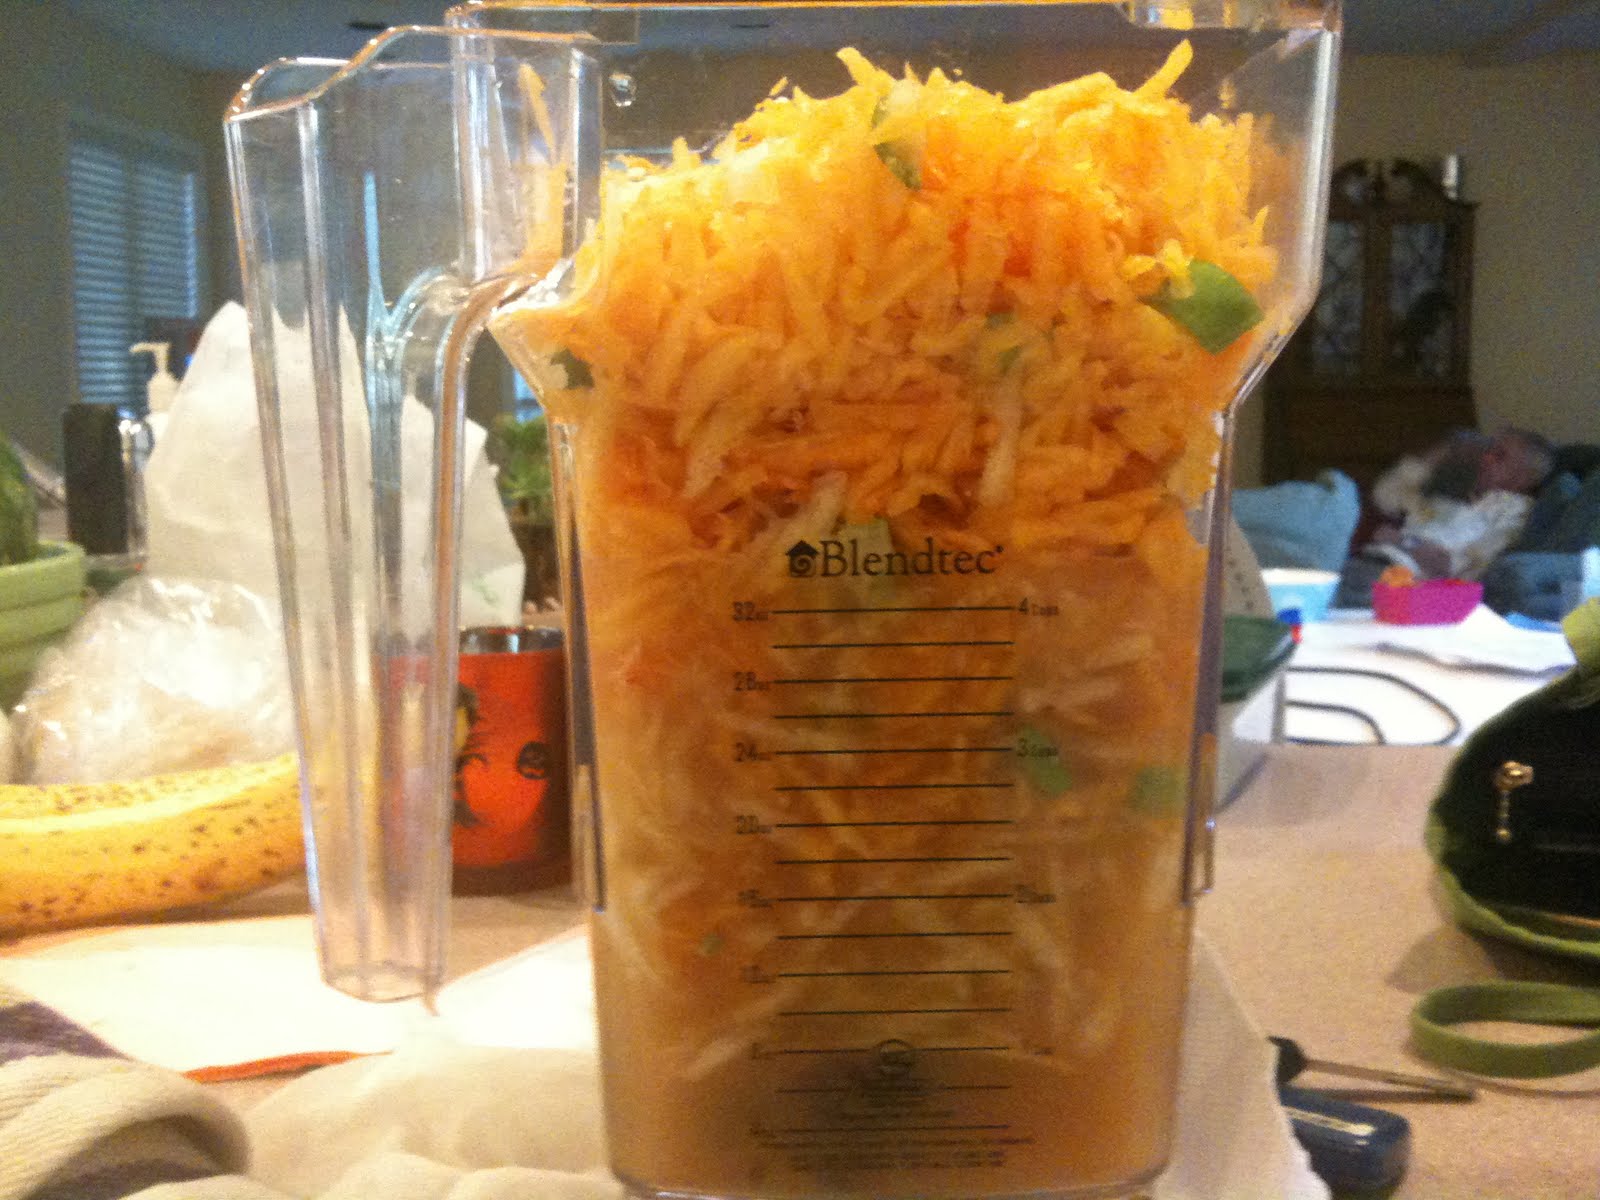
After rinsing the nuts, they need to go through a food processor with the slicing blade (alternatively you can slice by hand):
After slicing the nuts, they get added to the berries and the buckwheat and the spices are added: cinnamon, freshly grated nutmeg, sea salt and agave syrup to sweeten. The nutmeg gets grated on a microplane and is ultra fragrant and rich in flavor:

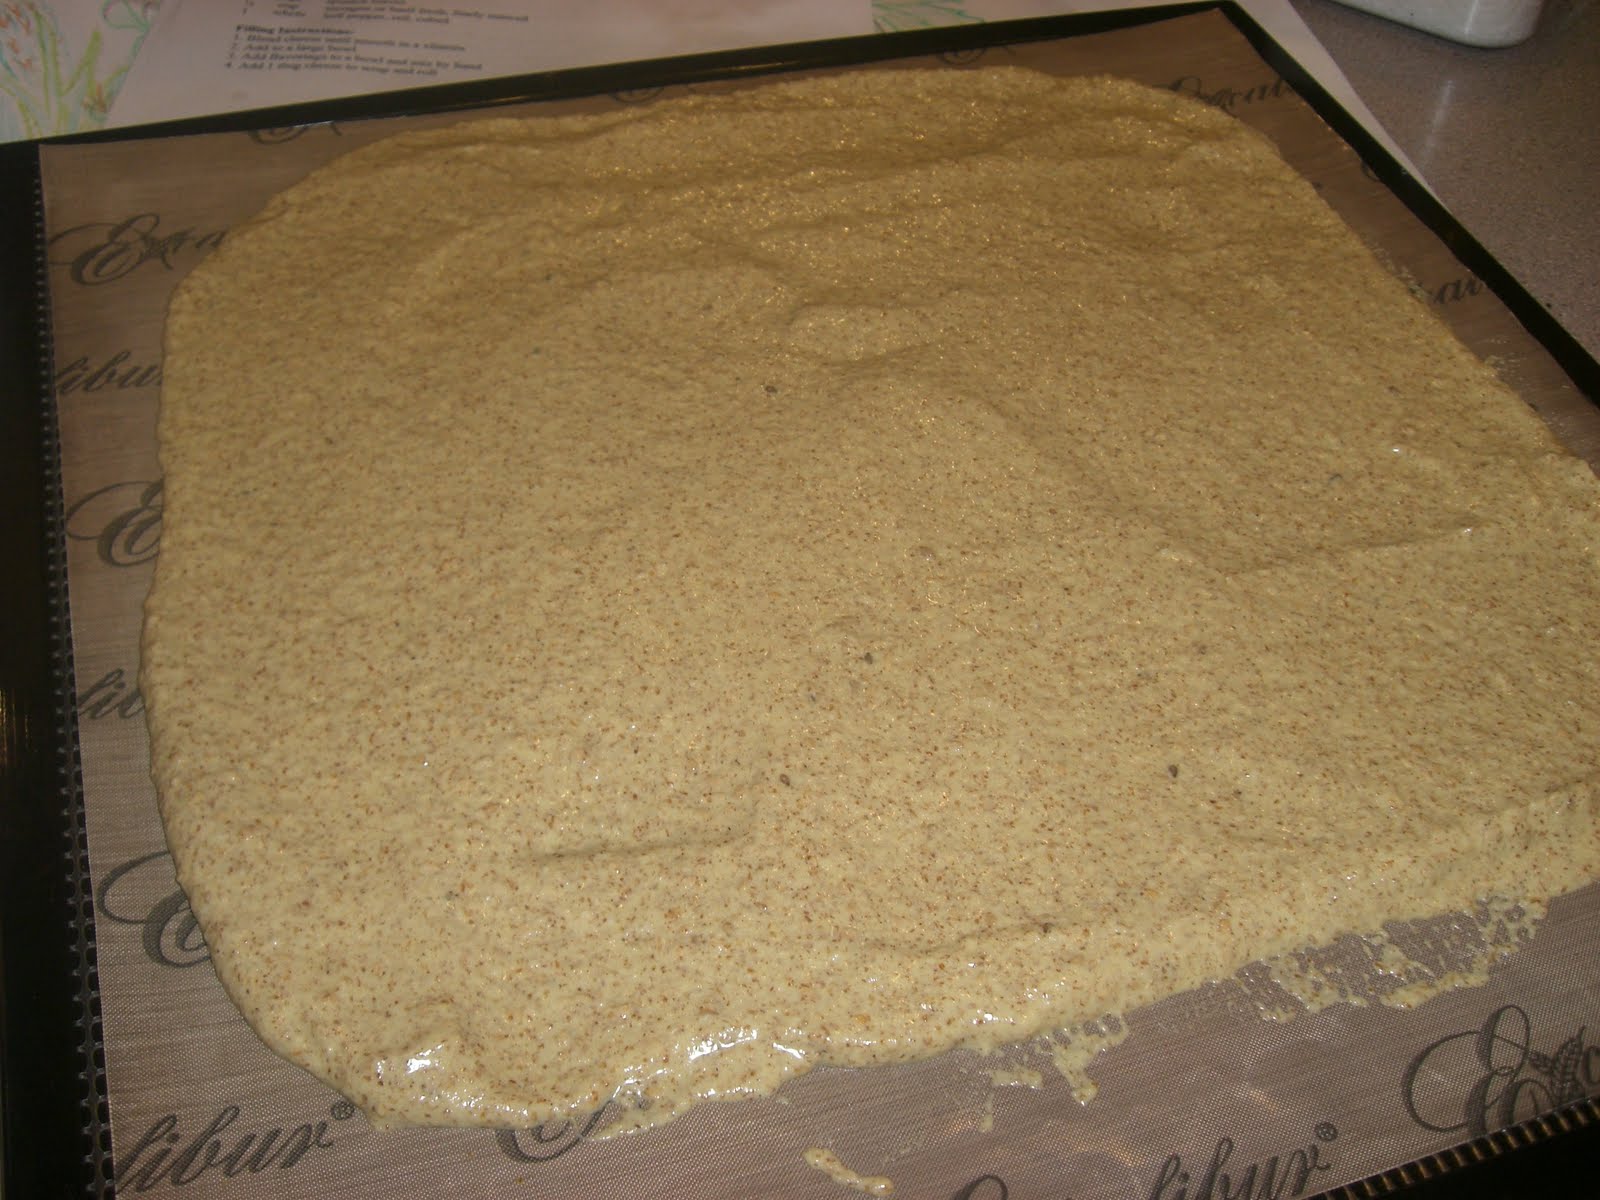
Once the ingredients are all mixed together they are spread out on the dehydrator trays and go into the dehydrator for 12 hours:
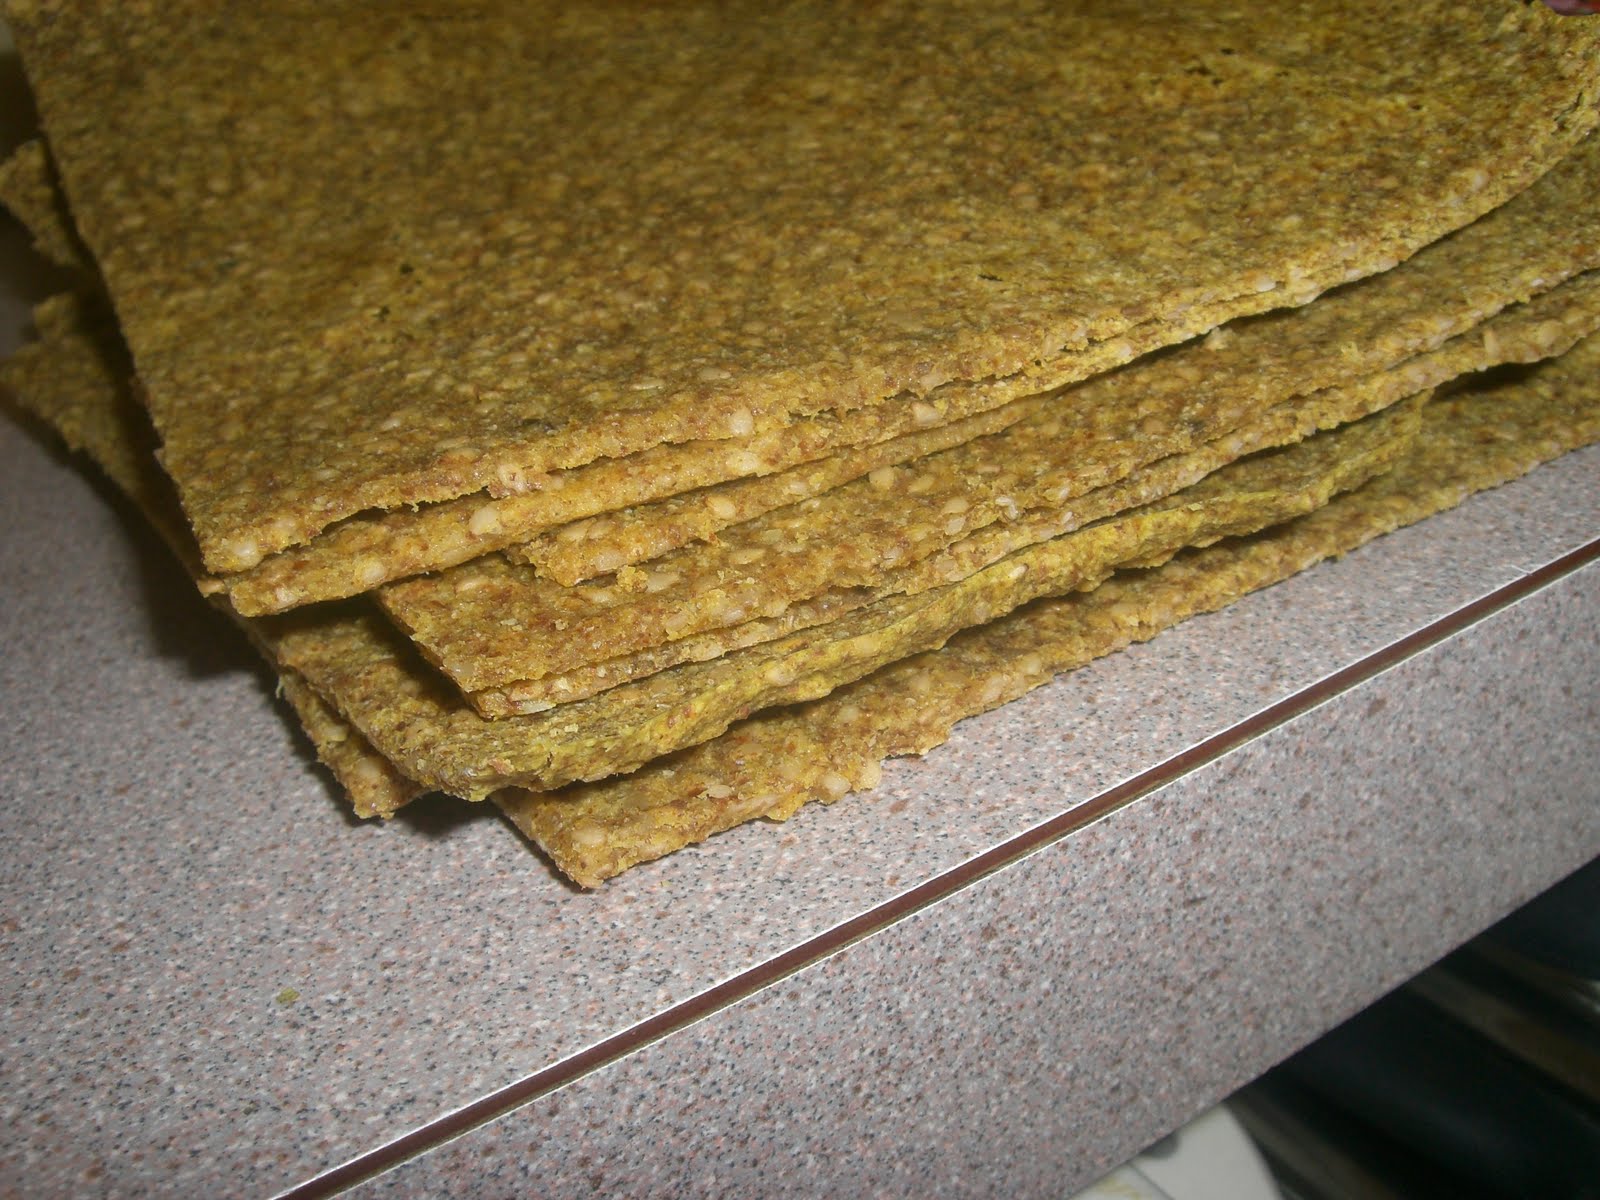
After 12 hrs, a bit of agave is drizzled over the ingredients and they are left to dehydrate for 12 more hours. The end product is a slightly sticky, definitely crunchy gRAWnola that is sweet from the agave, mulberries and goji berries and tangy from the cinnamon and golden berries. I ate it as cereal with homemade almond milk and it was to die for. Absolutely delicious!!!

Thanks Rob for posting the original recipe :)
Enjoy. Try something raw today!

Wednesday, December 22, 2010

Raw Sesame Onion Wraps

I swear, this is the easiest raw, dehydrated wrap you'll ever make....and it's delicious as well! The original recipe was actually a curry wrap, also delicious, but I don't LOVE curry. So I decided that the same recipe might be tweeked a bit by omitting the curry and adding onion and sesame seeds....the result was a flavorful wrap that had added texture from the sesame seeds.

Here is the recipe:
1-2 cups water
1 cup cup ground flax seeds
1 apple, peeled and seeded, chopped
1/2 sweet onion, chopped
1/2 cup dried, shredded coconut
1/2 cup raw, hulled sesame seeds
1 tsp sea salt
1 tsp lemon juice, fresh squeezed
1/4 tsp cinnamon
1/4 tsp turmeric

Technique

Start with 1 cup of water, lemon juice, onion and apple, blending in a high speed blender until combined.

Next add in coconut, salt, cinnamon and turmeric, again, blending until combined.

The ground flax gets added last, along with more water if necessary.


After a smooth, relatively thick consistency is achieved, stir the sesame seeds in by hand. Do not blend them in, because you want the texture that they yield in the finished product.


Pour out onto a nonstick Teflex sheet or parchment paper and spread out to about 1/2 - 1/4 inch thick.


Put in the dehydrator at 105 degrees and dehydrate for 5-6 hours. See the patches of light (still wet) and dark (dehydrated) "batter"...


After the first 5-6 hours, flip the wrap, placing it directly onto the dehydrator sheet, and dehydrate for about 2 more hours.


When it's dehydrated, it will look something like this and will still be pliable; note how the color is now homogeneous throughout the wrap.


Cut into the desired shape; I actually used a kitchen scissor to do so.


So now, wrap away or use as sandwich bread...
Here's a wrap I made with hummus (not raw), sunflower sprouts, hemp seeds, alfalfa and broccoli sprouts.

This wrap will become a staple in my house; it's too easy to not keep making. I'm going to play around with the taste of different spices in the future...I'll report back!
Enjoy and try something raw today!
Sharon

Saturday, December 18, 2010

Raw Brussels Sprout Chips

Ok, who doesn't like a good salty, crispy bite? Right, I'm sure just about everyone does....so using the same recipe for kale chips, you can use Brussels Sprout leaves and accomplish the same thing!

Here are some fine looking Brussels Sprouts, from Stillman's Farm, Lunenberg, Ma....you've heard me toot their horn many a time :)
So, all you need to do is cut off the bottom, where the leaves come together, and simply peel off all of the leaves. I put them into a bowl of water to rinse them.
Then, the recipe is exactly the same as the kale chips - take about a tablespoon of extra virgin olive oil, a teaspoon of apple cider vinegar, a generous pinch of salt and a drizzle of agave syrup, and mix it all in with the leaves, after they are rinsed and drained.
Put the Brussels Sprout leaves on to the dehydrator sheet and let 'em go...they don't need as long as an overnight dehydration, so check them after a few hours. It's OK to let them go overnight, but if you're hunkering for that salty bite, get them out earlier...
Before dehydration:
After dehydration:
Crispy and delicious....
Try this out. It's a neat way to eat your Brussels Sprouts.....if you don't have a dehydrator, cook these in a low oven, say 250-300 for 30 minutes, stirring half way through.

:) enjoy and try something raw today!

Thursday, October 28, 2010

Raw Butternut Squash Apple Cider Soup

I LOVE butternut squash; it's probably my most favorite winter squash. Today I used it in a raw soup, with a base of raw apple cider and fresh squeezed orange juice. I adapted the recipe from VegNews Magazine, only making a couple changes from their base recipe.

The recipe called for butternut squash, apple cider, orange juice, celery, a bit of spice, a few dates for sweetness and that's about it. I added in a couple of things:, some beautiful white carrots that I had from the farm... a garnish of fresh dill and cilantro - the recipe did not call for any herbs at all...and the juice of a fresh lemon to heighten and brighten the flavor.

I grated both the carrots and the squash, chopped the celery and set them aside. Look at how beautiful the white carrots are :)...they are the sweetest carrots I have ever tried.
In my blender, I added in the apple cider, which I had made with my juicer earlier, some fresh squeezed orange juice, some water, the dates (to soften up), salt and pumpkin pie spice.

When I added all the ingredients together, they filled up the entire blender container - it was packed with goodness.
The resulting soup was really delicious. The carrots and dates sweetened up the delicious, earthy squash. The celery added some body and some saltiness. The pumpkin pie spice added some warmth; to add some zing, I added the fresh, chopped dill and cilantro. The herbs really freshened up each bite of the soup. Each bite was like fall in a spoon.
Here is my adapted version of the recipe:

Ingredients
1 butternut squash, peeled, seeded and grated
2 carrots, grated
2 celery stalks, chopped
2 cups raw apple cider
Juice of 1 orange
1/2 cup water
4 dates (soaked in apple cider and OJ to soften up)
1 teaspoon sea salt
1/2 teaspoon pumpkin pie spice
4 TBS fresh, chopped herbs
Juice of 1 lemon

Technique
Blend all ingredients together in high speed blender, except fresh herbs and lemon juice. Add the herbs and lemon juice as well as more S+P (if needed) after blending.

Enjoy! Try something raw today :)

Thursday, October 21, 2010

Rawkin' Raw Chili

Today I made a raw chili recipe that Dee Charboneau posted on Road to Raw. The Road to Raw is a great website that runs raw food cleanses and offers a TON if information on raw food and healthy living. Dee posted a recipe called Penni's Rawkin' Raw Chili...I'm not sure who Penni is, but my guess is Penni Shelton, a well versed raw food enthusiast who runs the website Raw Food Rehab.
Regardless, I decided to make it because it seemed fitting on this cold, blustery, rainy fall day.
Here is the recipe - don't get turned off by the amount of ingredients. It actually comes together quite quick...I will indicate where I made adjustments to the recipe.

Penni's Rawkin' Raw Chili
1 cup soaked almonds (walnuts would also work well) - I used almonds
1 cup carrots
1 med portabello mushroom (or 6 shiitake) - I used shiitake and I soaked them in Liquid Braggs before using them in the recipe to flavor them up and "cook" them a bit
1/2 cup finely minced red bell pepper
1/3 cup finely minced red onion - I used scallions
1-2 finely minced jalapeno, without the seeds - I used a serrano
1 cup sundried tomatoes, soaked (reserve 1 cup soak water)
1 cup cherry or grape tomatoes
1/3 cup soaked golden raisins
2 T fresh leeks (yellow or white onion would work) - I used a small shallot
3 T chili powder - I used Powdered New Mexico Chiles
2 cloves garlic - I used 1 garlic clove only
1 T olive oil
2 t Alder Smoked Sea Salt (Celtic is also fine) - I used Himilayan Sea Salt
2 t apple cider vinegar
2 t dried oregano - I used Mexican Oregano
1 tsp. cumin
1 handful chopped cilantro, stirred in at the end, prior to dehydration

Technique
Put nuts and carrots into a food processor and run until well blended. This will be your "meat base," so don't over process. Once ground, place into a large bowl and set aside.

Either on a cutting board or in your food processor, chop the mushroom (I marinated the mushroom in Liquid Braggs, see picture. I drained the mushrooms prior to processing them), red bell pepper, scallions and serrano. Add this to the bowl. I used my food processor to do this step.

In a high powered blender, such as a Vita Mix or Blend-Tec, add all of the remaining ingredients and blend until you have everything well combined and liquefied. Stir this mixture into the bowl with the existing ingredients to complete the chili.

The recommendation was to place the chili into a dehydrator set at 145 degrees for about one hour, stirring the chili every 15 minutes will help to warm it evenly. (Although your dehydrator will feel hot, the temperature of the food will not exceed 110 degrees in this amount of time). I didn't have the luxury of being able to stir the chili every 15 minutes, so I stuck it in the dehydrator @ 115 degrees for 1 hr, then 105 degrees for 1 hr and ate it after that. It wasn't as warm as I would have liked it to be, but it was delicious.

Here is the bowl of chili, with cilantro, prior to going into the dehydrator
And after
You can see it got a little thick on the edges (that was the best, most yummy part!!). Overall, delicious. Tomorrow, when I eat more, I'll try the 145 degree dehydration with stirring every 15 minutes, and I'll garnish it with avocado. Already looking forward to it!!
Try something raw today!

Monday, October 18, 2010

Dried Apple Chips

Fall is apple season and I'm feeling the apple love. After becoming inundated with apples from a visit to the apple farm, I needed to use them up. I decided to make some apple chips in the dehydrator.
I used my spirulizer to make ultra thin slices, using the flat blade.

I sliced up 5 apples. To the apples I added the juice of a lemon, a few shakes of pumpkin pie spice and a short drizzle of agave syrup.
The pumpkin pie spice from Trader Joe's is a mix of cinnamon, ginger, cloves, lemon peel, cardamom and nutmeg. It goes nice with the tang of the lemon and the sweetness of the agave and the apples. The lemon juice keeps the apples from turning brown when dehydrating.

I laid the apples out on the dehydrator trays, not worrying too much about getting a single layer and dehydrated the apples for about 20 hrs.
Here is what the finished apples looked like:


The apples were crispy and delicious with a hint of spice. My kids ate them up, so there's proof that they tasted good :)
Enjoy - try something raw today!